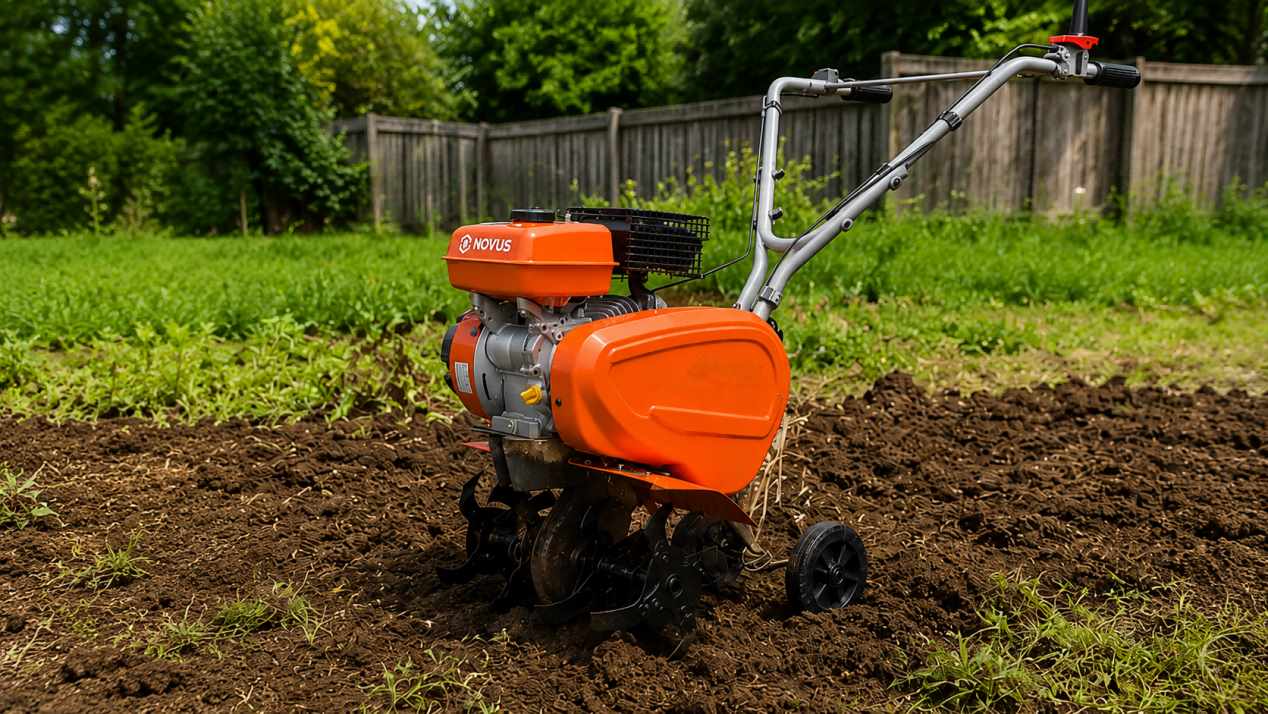
The tiller often needs to operate in complex and harsh conditions in the garden. After each operation, soil, weed debris, plant roots and water stains tend to accumulate easily on the blades, wheels and frame of the machine. If not cleaned regularly, it will not only significantly increase the difficulty of subsequent cleaning operations, but also accelerate the wear of the machine’s components and shorten the service life of the equipment.
In fact, the daily cleaning process of the tiller is simple and efficient. Under normal conditions, it only takes a few minutes to clean after each operation to maintain the equipment in good condition and ensure the smooth progress of the next gardening operation.
This article will fully explain the standardized cleaning process of the tiller and list the key equipment parts that need to be checked simultaneously during the cleaning process.
What You’ll Need Before You Start
Before cleaning your tiller, gather a few basic tools:
- Garden hose
- Plastic scraper
- Wire brush
- Clean rags or towels
- Work gloves
- Multipurpose lubricant
Avoid using metal tools with sharp edges that could scratch painted surfaces or damage components.
Cleaning Your Garden Tiller Step by Step
Many people simply store the tiller in the warehouse or shed after the work is done, leaving behind the residual soil, weeds and straw. These residues can cause numerous potential faults. The wet soil adhering to the cutting tools and metal body dries out and becomes stubborn to clean, and it is prone to water accumulation and rusting. The grass roots and weeds tangled in the rotating parts make subsequent cleaning and maintenance extremely troublesome.
The thick mud on the machine body can cover loose parts, worn-out blades, oil leaks and other faults. If small problems are not dealt with in time, they will eventually escalate into major damages.
A standardized set of regular cleaning procedures is easy to operate and can significantly reduce the maintenance workload of the equipment throughout the ploughing process.
Step 1: Let the Engine Cool Down
After finishing the farm work, don’t rush to clean the tiller. You must wait for the engine to cool down completely before proceeding.
First, turn off the engine and stop the machine. Wait until all rotating parts have completely stopped. When cleaning around the cutter disc, remember to remove the spark plug connection wire to further ensure operational safety.
Directly spraying water on the hot body is strictly prohibited. Rinsing the hot engine parts poses safety risks. Do not do this at all.
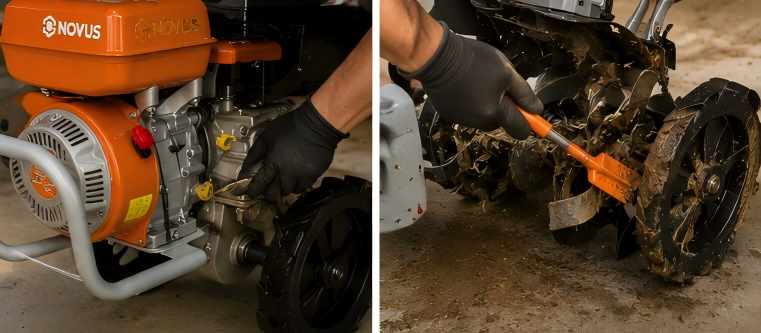
Step 2: Remove Soil From the Tines
The tines usually collect the largest amount of debris during operation.
Use a plastic scraper to remove packed soil from the tines and surrounding areas. If roots, weeds, or long grass have wrapped around the tine shaft, carefully remove them by hand while wearing gloves.
For stubborn dirt, a wire brush can help loosen dried soil without requiring excessive force.
Take your time during this step. Removing debris now prevents it from hardening and becoming more difficult to clean later.
Step 3: Wash the Frame and Wheels
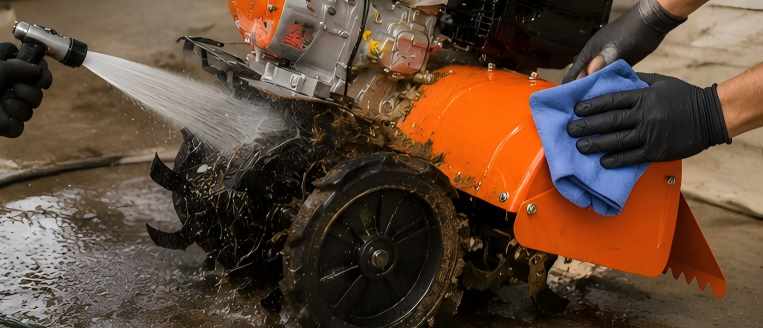
Once the larger debris has been removed, rinse the machine with a garden hose.
Focus on the tines, wheel assemblies, tine shield, and frame. A moderate stream of water is usually enough to remove remaining dirt.
Avoid directing water toward sensitive engine components, including:
- Air filters
- Fuel system parts
- Electrical connections
- Spark plug area
A pressure washer is generally unnecessary and may force water into areas where it shouldn’t be.
Step 4: Dry the Machine Completely
After washing, use a clean cloth or towel to remove excess water from metal surfaces.
Pay particular attention to:
- Tines
- Wheel hubs
- Fasteners
- Exposed metal parts
Allow the tiller to air dry for a few minutes in a well-ventilated area before storing it.
Storing a wet machine can encourage rust, especially if it will remain unused for several days.
Step 5: Inspect Moving Parts
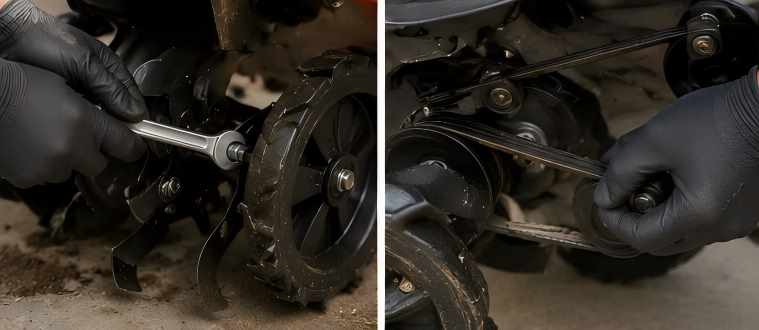
Cleaning provides a good opportunity to perform a quick inspection.
As you wipe down the machine, check for:
- Loose bolts and nuts
- Bent or damaged tines
- Worn belts
- Oil leaks
- Cracked or damaged wheels
These checks only take a few minutes and can help identify small issues before they become larger repairs.
If any parts appear excessively worn, address the problem before the next use.
Step 6: Apply Lubrication
After the tiller is clean and dry, apply lubricant to any recommended moving points according to the owner’s manual.
Common areas may include:
- Wheel axles
- Pivot points
- Control linkages
- Cable connections
A light coating of lubricant can help reduce friction and protect metal parts from moisture.
Avoid overapplying lubricant, as excess oil can attract dust and dirt during future use.
How Often Should You Clean a Garden Tiller?

For most homeowners, the best practice is simple: clean the tiller after every use.
Even if the machine doesn’t appear particularly dirty, a quick cleaning prevents soil from hardening and keeps maintenance manageable.
Certain conditions may require extra attention:
| Working Condition | Recommended Cleaning |
| Dry garden soil | Basic cleaning after each use |
| Damp or muddy soil | Thorough cleaning immediately after use |
| Heavy clay soil | Remove packed soil before it hardens |
| Weedy areas | Check for roots and grass wrapped around tines |
In addition to routine cleaning, it’s a good idea to perform a more detailed inspection several times throughout the gardening season.
The standard cleaning process for a tiller does not require special tools and takes a short time. After the equipment cools down, remove the debris from the cutter teeth, rinse the frame, dry all the components, inspect the moving parts and add lubricating oil. This will enable the machine to maintain excellent working conditions for a long time.
A brief maintenance after each operation can not only simplify the subsequent farming operations but also ensure that the equipment is ready to work normally at any time.

Leave feedback about this