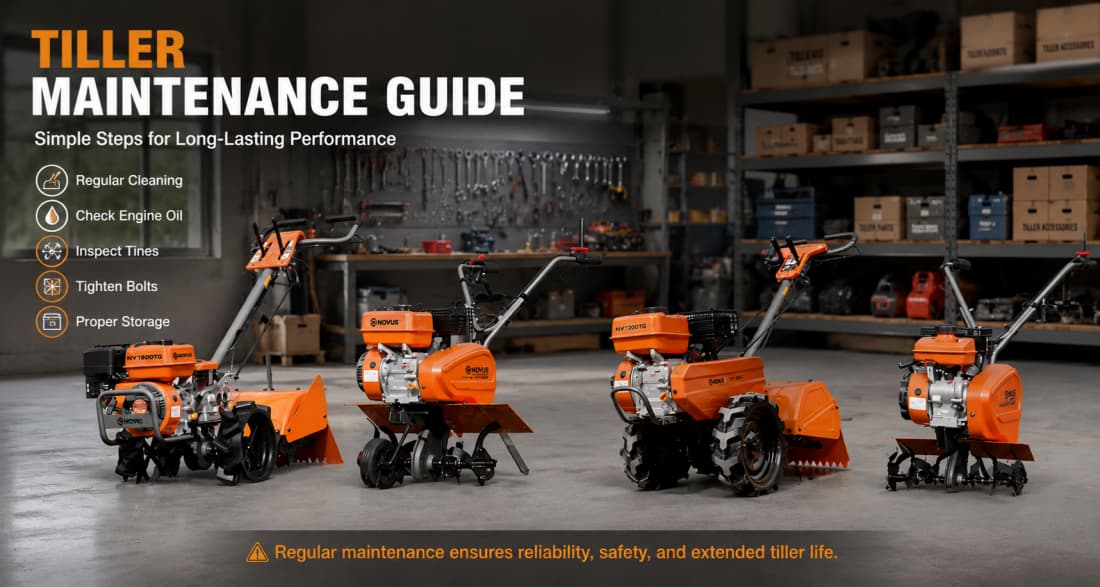
Gardening season is here, and honestly nothing kills a good planting day quicker than a tiller that just wont start, or that keeps bogging down in tougher soil. Whether you own a powerful rear tine tiller for breaking new ground or a nimble front tine tiller for maintaining established beds, regular maintenance is the secret to reliable performance, lower costs, and safer operation.
In this 2026 guide you’ll see how to take care of your garden tiller, sort of from the daily quick checks to the season-end storage steps. When you maintain it the right way, your machine can last well twice as long, and you might dodge repairs or replacements that cost you serious money.
What You’ll Need Before You StaWhy Tiller Maintenance Matters
Tillers get put to work in gritty, dusty places, and that kinda stuff speeds up the wear on engines, tines , belts ,and transmissions. If maintenance is skipped, you end up with hard starts, lower output, surprise failures and even safety hazards—like bits of debris that fly off or sudden jerks especially with front tine models in stubborn soil.
Rear-tine tillers, which are heavier and self propelled, they’re kind of the better fit for big plots and that tough clay, do ask for more attention to the transmission setup, and also to counter rotating tines. Meanwhile front-tine tillers, lighter and easier to move around in practice for smaller gardens, you’ll want to pay more focus on keeping the tine balance right plus reducing operator effort, because otherwise it becomes a chore.
Consistent care pays off: better fuel efficiency, smoother operation, and peace of mind during peak spring and fall seasons.
Know Your Tiller: Key Components
Before diving into maintenance, understand the main parts:
- Engine — Gas or electric motor.
- Tines — The blades that churn soil (front or rear mounted).
- Transmission/Drive System — Belts, chains, gears, and wheels.
- Tires/Wheels — Provide stability and propulsion (especially important on rear tine models).
- Safety Features — Shields, kill switches, and guards.
Pro Tip: Always keep your model’s owner’s manual handy — specific torque specs and intervals vary by brand.
Tiller Maintenance Schedule
| Interval | Key Tasks | Notes for Rear Tine | Notes for Front Tine / Electric |
| Before Every Use | Visual inspection, clean debris, check oil/fuel | Transmission oil check | Battery charge, cord inspection |
| Every 5-10 Hours | Clean air filter, check belts/tines | Lubricate pivot points | Motor cooling fins |
| Every 30 Hours / Season | Oil change, spark plug, deep clean | Gearbox oil | Less frequent oil (electric) |
| End of Season | Full clean, fuel treatment, storage prep | Drain fuel or stabilize | Battery storage at 50% charge |
| Annually | Professional tune-up if needed | Transmission service | Full electrical inspection |
Daily & Pre-Use Maintenance
- Battery Check (Cordless) — Ensure batteries are charged and contacts are clean.
- Safety First — Wear sturdy boots, gloves, eye and ear protection. Disconnect the spark plug wire (gas) or remove the battery (electric) before any cleaning or adjustment.
- Visual Inspection — Look for loose bolts, cracked shields, damaged tines, or worn belts. Check tire pressure on pneumatic tires.
- Clean Debris — Remove grass, mud, and roots from tines and undercarriage. Use a stick or low-pressure hose — avoid high-pressure water on hot engines.
- Fuel & Oil Check (Gas Models) — Use fresh, stabilized fuel. Check engine oil level with the tiller on level ground.
Step-by-Step Routine Maintenance
Engine Care (Gas-Powered Tillers)
- Oil Changes: After the first 2-5 hours (break-in), then every 25-50 hours or annually. Use SAE 30 or manufacturer-recommended oil. Drain while warm for best results.
- Air Filter: Clean foam filters with soap and water; replace paper filters as needed. Dusty garden conditions may require more frequent service.
- Spark Plug: Inspect and clean annually or every 100 hours. Replace if fouled. Gap according to specs (typically 0.030″).
- Cooling Fins: Blow out dust and grass clippings to prevent overheating.
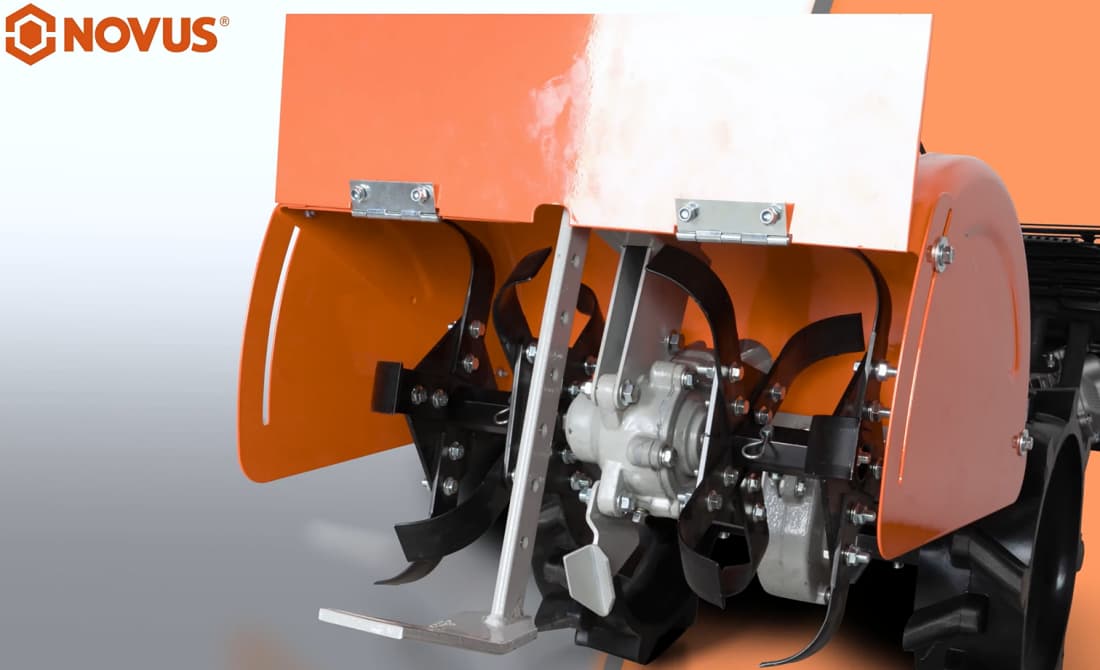
Tine (Blade) Maintenance
Tines do the hard work and wear fastest.
- Inspect for bends, dull edges, or missing pieces after every few uses.
- Sharpen or replace as needed — dull tines reduce efficiency and increase strain on the engine.
- On rear tine tillers with counter-rotating modes, ensure tines rotate freely in both directions.
- Balance is critical to reduce vibration.
Drive System & Transmission
- Check and adjust belt tension (common wear item on both front and rear models).
- Lubricate cables, pivots, and chains.
- For rear tine tillers, check gearbox oil level regularly — low oil leads to expensive repairs.
- Clean and grease wheel bearings.
Electric & Battery Models
- Keep motors and vents free of dust.
- Store batteries at 40-60% charge in a cool, dry place.
- Avoid deep discharges and extreme temperatures.
Seasonal Maintenance & Winter Storage
Spring Tune-Up:
- Full inspection, fresh oil, new spark plug, and test run before first use.
During the Season:
- Clean after every use to prevent rust and buildup.
- Monitor performance — unusual noises or vibrations need immediate attention.
Fall/Winter Storage:
- Thoroughly clean the entire machine.
- Drain fuel or add stabilizer and run the engine for a few minutes.
- Lightly oil tines and exposed metal to prevent rust.
- Store in a dry, sheltered area (off concrete floors if possible).
- For electric models, remove and store batteries separately.
Troubleshooting Common Tiller Problems
- Won’t Start: Check fuel, spark plug, air filter, or safety switches.
- Lacks Power: Clogged tines, dull blades, or dirty air filter.
- Excessive Vibration: Unbalanced or damaged tines.
- Hard to Maneuver (Rear Tine): Low tire pressure or transmission issues.
- Overheating: Blocked cooling fins or low oil.
If basic fixes don’t work, consult a small engine repair shop — many issues are simple but can worsen if ignored.
Safety Tips for Tiller Owners
- Never operate with missing guards.
- Keep bystanders (especially children and pets) at a safe distance.
- Be extra cautious in rocky or root-filled soil — tillers can kick back suddenly.
- Follow OSHA-style guidelines: proper footwear, no loose clothing, and awareness of underground utilities.
Essential Tools & Supplies Checklist
- Wrenches and sockets set
- Screwdrivers
- Oil, grease, and fuel stabilizer
- Spare spark plugs, air filters, and belts
- Tine sharpening tool or replacement tines
- Pressure gauge for tires
- Shop rags and cleaning brush
Final Thoughts: Make Maintenance a Habit
A well maintained tiller turns into some kind of dependable companion for your garden for years, and it kind of keeps showing up when you need it. Whether you are getting ready raised beds with a front tine tiller or you are carving up virgin soil with a heavy duty rear tine model, take about 15-30 minutes for care after each use. It sounds a bit much, but later it really saves time, money, and yes frustration too.
Rear Tine vs Front Tine Tiller: Which Should You Buy?
Best Tillers for Clay Soil in 2026
Happy gardening — may your soil be loose and your tiller always ready!
This guide is for general informational purposes. Always refer to your equipment manufacturer’s manual for model-specific instructions.

Leave feedback about this